1.07.2012

the entertainer

So I totally meant to post this before New Years rolled around. You know, in case you wanted to maybe get an idea for an easy appetizer to serve at your holiday party. And now you're probably into the whole "healthy recipe" thing since New Years Resolutions are in full effect. But I'm going to share this easy appetizer idea anyway. I mean, technically it's made of fruit, fruit is healthy. Especially when paired with cheese and nuts. Right?! Either way, make sure you make these for your next party!

Growing up, my mom was always hosting some sort of party or another. Nothing crazy or over the top but she always put thought, time, and a little something extra into it. I both loved and hated when she had people over because 1. it meant I had to help clean the house and 2. I got to play in the kitchen for a few hours as her Sous Chef. 

I loved watching my mom work in the kitchen. It's like she was a choreographed ballerina whipping up a from-scratch batch of tea cookies, while spinach and pine nut stuffed puff pastries were browning in her oven, and Grand Marnier injected chocolate dipped strawberries were chilling in the refrigerator. She made it look easy and more importantly, she had fun with it. Everything was always done from scratch and with attention to detail. And I wonder where my anal-retentiveness comes from! 

This recipe is one of her most popular appetizers, and an easy one at that! Roquefort and Walnut Grapes. They're not the bell of the ball, but they're certainly a tasty one. Blue cheese is mixed with cream cheese to tone it down and then red grapes are brought into the mix. Rolled in nuts, it's the perfect app to go with your wine! Juicy and nutty with the pungent kick of some smelly blue cheese*... what could be better?!

* I will say I'm not the biggest blue cheese fan (typically it's just too strong for me) BUT these grapes are the exception. The cheese is subtle enough and just adds a little something extra to the sweet, juicy burst of the red grapes. 

roquefort + walnut grapes

ingredients:
1 lb seedless red grapes, rinsed and dried
8 oz cream cheese, room temperature
.14 lb roquefort blue cheese, room temperature
2 T. milk
fresh cracked pepper to taste
6 c. walnuts

In a bowl, combine cheeses and milk, whip with an electric mixer until smooth and creamy. Drop in the grapes and give them a good stir. In a food processor, finely chop walnuts until they're a coarse powder. Pour on a plate or shallow bowl. Next drop a few grapes, one at a time into the nuts and toss to coat and set on a plate. Drop more and repeat until there are no grapes left.

It's that easy! I like to assemble them on a plate to resemble a bunch of grapes but you could put them on toothpicks and place into an apple or a harder piece of cheese on a cracker plate. Get creative!

improv style:
you can use different types of blue cheese as long as they're creamy enough to mix well with the cream cheese. if you're a big fan of the stinky blues, use more of it to get a higher concentration of flavor. similarly if you're not a big fan you could use less or substitute the cheese all together. something like a goat cheese or mascarpone - as long as it is creamy enough to blend and adhere to the grapes. if you don't use blue cheese, consider adding in some herbs (fresh or dried) to add a little more flavor. I would suggest thyme or rosemary and even add a bit of lemon zest, too. you could also substitute the red grapes for olives if you're not a fan of grapes. it would completely change the idea behind the dish but could be a really fun alternative.


you could try substituting the milk for red wine or port. if you're pairing the grapes with wine it would be best to leave it out but if you're not... that would be a really fun way to switch it up.  also, you can use any kind of nut you like. i think walnut and pecans work best with this recipe but you can use pistachios, cashews, hazelnuts (ooh, that could be reallllllll good), or even almonds . i actually ended up doing all sorts of nuts since i didn't have enough walnuts to do the whole batch.

if you don't have a food processor you could chop, chop, chop as fine as you can and then take the back of a heavy pan and smash the chopped pieces to get them even finer. it's a bit more work, but it's worth the effort. you could also try doing it in a blender but food processor is #1 if you have it. a great idea if you have leftovers is to add these to your salad with a simple balsamic vinaigrette! talk about a fancy salad!

Not the best pic but it gives you an idea of what's inside... 


12.29.2011

perfection

It's very rare when I stumble upon a recipe that needs no changing. My mom first made me this soup about 8 years ago and it was love at first bite. It's creamy, curried, perfectly balanced with a little kick from cayenne, fresh bursts of apple, rich and nutty from dry sherry, and subtle hints of herbaceous dill. This is hands down my favorite soup, EVER. 

If you're looking for a first course for your New Years Eve dinner party, this soup will knock the socks off of your guests. Plus, we all need a rich indulgent last meal before we swear off fatty foods in the New Year, right?! Who needs New Years Resolutions anyway! I promise this soup will not disappoint. 


apple, curry + chicken soup
slightly adapted from pasta & co
yields 3.5 pints (7 cups)

ingredients:
4 chicken breasts 
1 stick of butter (¼ lb)
5 shallots, finely minced
3 celery stalks, finely minced
1 T. curry powder
1 t. chicken bouillon (or 2 cubes)
2 t. dried dill 
1 t. ground black pepper
½ t. ground nutmeg
½ T. cayenne 
½ c. flour
1 c. dry sherry
1 c. chicken stock
¾ c. apple cider 
2 c. half and half
2 c. heavy cream
1 large granny smith apple finely diced (peeled and cored)
salt + pepper

In a large saute pan place chicken breasts with enough water to cover and gently simmer until cooked halfway through (about 6 minutes). Flip breasts over and cook for another 4 minutes until almost cooked. The chicken should still be a little pink in the middle. Chop or shred and set aside.

In a large sauce pan, melt butter and saute shallots and celery until soft (about 10 minutes). Once translucent and softened add your curry, chicken bouillon, dill, pepper, nutmeg, and cayenne. Stir and cook for 1 minute. Add in flour and cook for an additional 2 minutes. Add in sherry, chicken stock and apple cider. Stir until mixture becomes thick. Add in the chicken, cream, half and half, and chopped apples. Gently simmer for another 10 minutes to finish cooking the chicken. Add additional salt and pepper to taste. 

improv style:
this recipe is fabulous and fatty... i get it if it sounds scary to consume so much fatty liquid. it's glorious, i promise. still not convinced? ok, ok... you can substitute for coconut milk, whole milk, or any kind of milk. but be warned, you're sacrificing texture and the richness. 

you can adjust the amount of cayenne if you don't like spicy or like it spicier. the cream balances out the spicy so well in this soup. i love spicy but i don't like to burn my tongue. that's what this soup is, balanced spicy perfection. you can use any kind of apple you have but granny smith is my favorite. also you could leave out the chicken or substitute it with tofu to make it vegetarian. if you don't have dry sherry, try using a cognac or brandy. shallots can be substituted for onions and dry dill can be substituted for fresh, just double the amount as fresh herbs aren't as strong in flavor as dried ones. not a fan of celery? me either... it really just adds a textural element to the dish. if you're still not convinced, leave it out, it will still turn out. you can make it gluten free by thickening it with cornstarch or rice flour. 

this is great as a soup but would also be awesome over rice or with rice mixed in. 


12.11.2011

worth the extra step

I'm a big believer in "it's the small things that make all the difference". I enjoy taking extra steps to make a dish extra special and tasty. But I also know that not everyone feels this way. Which is why I strive to show people how easy it is to cater a recipe to your taste but also the amount of effort you want to put into that recipe. There's shortcuts you can take if you don't have the same passion for making everything from scratch.


After watching an episode of Barefoot Contessa, I was totally inspired to try making my own vanilla extract. A quick search on the internet and I realized it's all the rage right now. And while I understand it sounds a bit crazy to make your own vanilla extract, IT'S NOT!!! A bottle of good quality vanilla extract will cost you about $20 for 8 oz. It costs about $40 to make a HANDLE (1.75 liters) of vanilla extract. So you get better quality for way less money. Not only that, but it is an incredibly easy process. I'll never buy vanilla extract again! 


To make vanilla extract you need 2 ingredients. Vanilla beans and vodka. A lot of people have misconceptions about what makes high quality "bourbon vanilla extract". It's actually the type of bean you use, not substituting bourbon for vodka. Vanilla beans at the grocery store are really expensive. I found a great seller on ebay that sells the best vanilla beans I've ever come across. They're plump and juicy. A ½ lb costs about $16.99 (about 50 beans) and they run specials all the time where they will throw in an extra ¼ lb for free! If you want to get real fancy you can buy "Gourmet A Madagascar Bourbon Vanilla Beans" (the highest quality) for $26.99 a ½ lb. If you want to make your own extract but not in bulk, My Spice Sage sells much smaller quantities for cheap. Vanilla Saffron imports sells organic and different varieties (tahitian and mexican) if that's important to you. 

Another great part about making your own extract is that you can add a little more vodka to the bottle as you go and it replenishes itself! Plus you get gorgeous flecks of vanilla beans in your food since you're using real vanilla beans. I always think the little vanilla flecks make a dish feel more special. 

I got my bottles here (15 - 4 oz bottles per 1.75 liters you make), but you can us any container you like. I stumbled upon a blog that had the most gorgeous design for their homemade extract. I loved the gingham ribbon she paired with the bottles so I copied the idea. I thought it would be a fun gift for the Holidays. I bought sticker printer paper from amazon for the labels as well as a circle cutter to make the cutting process easier. I'm not going to lie, it was A LOT of work but I think it turned out great. If you don't want to put that much effort in, I don't blame you. BUT, making the extract is easy, so I highly suggest trying it.

I had a few leftover vanilla beans so I decided to make some vanilla sugar too. It's even easier to make! There's tons you can do with vanilla beans so go crazy, buy in bulk and enjoy the extra special feeling you get from baking and cooking with REAL vanilla beans! 

vanilla extract
yields 1.75 liters (15 - 4 oz bottles)

ingredients:
40 madegascar vanilla beans
1.75 liters vodka

Slice vanilla beans length ways down the middle without slicing all the way through the bean (if you do it's not the end of the world, just drop it in anyway). Pour out about a cup of the vodka and start dropping the beans in the jar. Use common sense... if the liquid is coming to close to the top, pour out a little more. Once all the beans are in, pour excess vodka back in the bottle until it's filled to the top. Use the extra leftovers for a drink, or you can put a bean or two in a smaller jar with the remaining vodka. Give it a good shake and set it in a cool dark place for 2 months. Give it a shake every now and then (I did about 2-3 times a week). In 2 months you'll have beautiful, fragrant, homemade vanilla extract! 

If you're going to make mini bottles like I did, after 2 months, pour the liquid into your containers. i cut the used vanilla beans in half and placed 1 whole vanilla bean in the bottle as well. This way you continue to build the flavor in the mini bottles over time. 

Day 1

2 months later

improv style:
it seems everyone has a slightly different bean to liquid ratio. it's not an exact science, as long as you're close (within a bean or two, you should be fine). 2 months was the general wait period but some people said up to 8 months. my guess is after 2 months, you're good to go but the longer it sits, the better it gets. if you want to make a small, personal batch, try doing 2 vanilla beans and 1 cup of vodka. 

on to the fun stuff... i used smirnoff vodka because it's triple distilled (yeast free) and better quality. some people said use cheap vodka, some disagreed. i'm sure it would turn out just fine with cheap vodka but my rule of thumb is if you wouldn't drink it, why cook with it?!  to each his own... seriously, it will still turn out. another thought would be making the extract with other liquors. why not do bourbon or rum?! cognac would be really fancy too! yes, you'll have more flavor imparted in your vanilla (vodka is more subtle) BUT if you love rum, for example, why not try a rum based extract instead?! 

lets talk BEANS! i used high quality madegascar bourbon vanilla beans. you could use those, or extract beans if you wanted to go cheaper. i love love love mexican vanilla extract. it has a really rich, deep vanilla flavor to it. you could use any kind of vanilla bean you come across. your extract will still turn out just fine. that being said, why stop at just vanilla extract?! you could take the same principal and make mint, lemon, orange, etc... for more subtle flavors like those i would recommend sticking to a vodka based extract. 

also, most store bought extracts have added sugar. since most baking requires sugar anyway, i left it out of my recipe. you could simply add a bit of sugar to your extract if you wanted. i would recommend adding a 2:1 sugar to water ratio simple syrup if you want to sweeten it. That or extra fine sugar so it will dissolve properly. 


vanilla sugar
ingredients:
3 cups sugar
1 vanilla bean

Split vanilla bean lengthwise. Place in jar with sugar and give it a shake. Let it sit for at least 1 week. BOOM... it's that easy!

improv style:
you can use any type of sugar you like... organic, super fine, raw, you get the idea. also, why not play with combinations of flavors? you could do vanilla + thyme sugar, or your favorite herb. you could go completely savory with it and make a vanilla salt instead. get creative!!


12.02.2011

winter warm me up

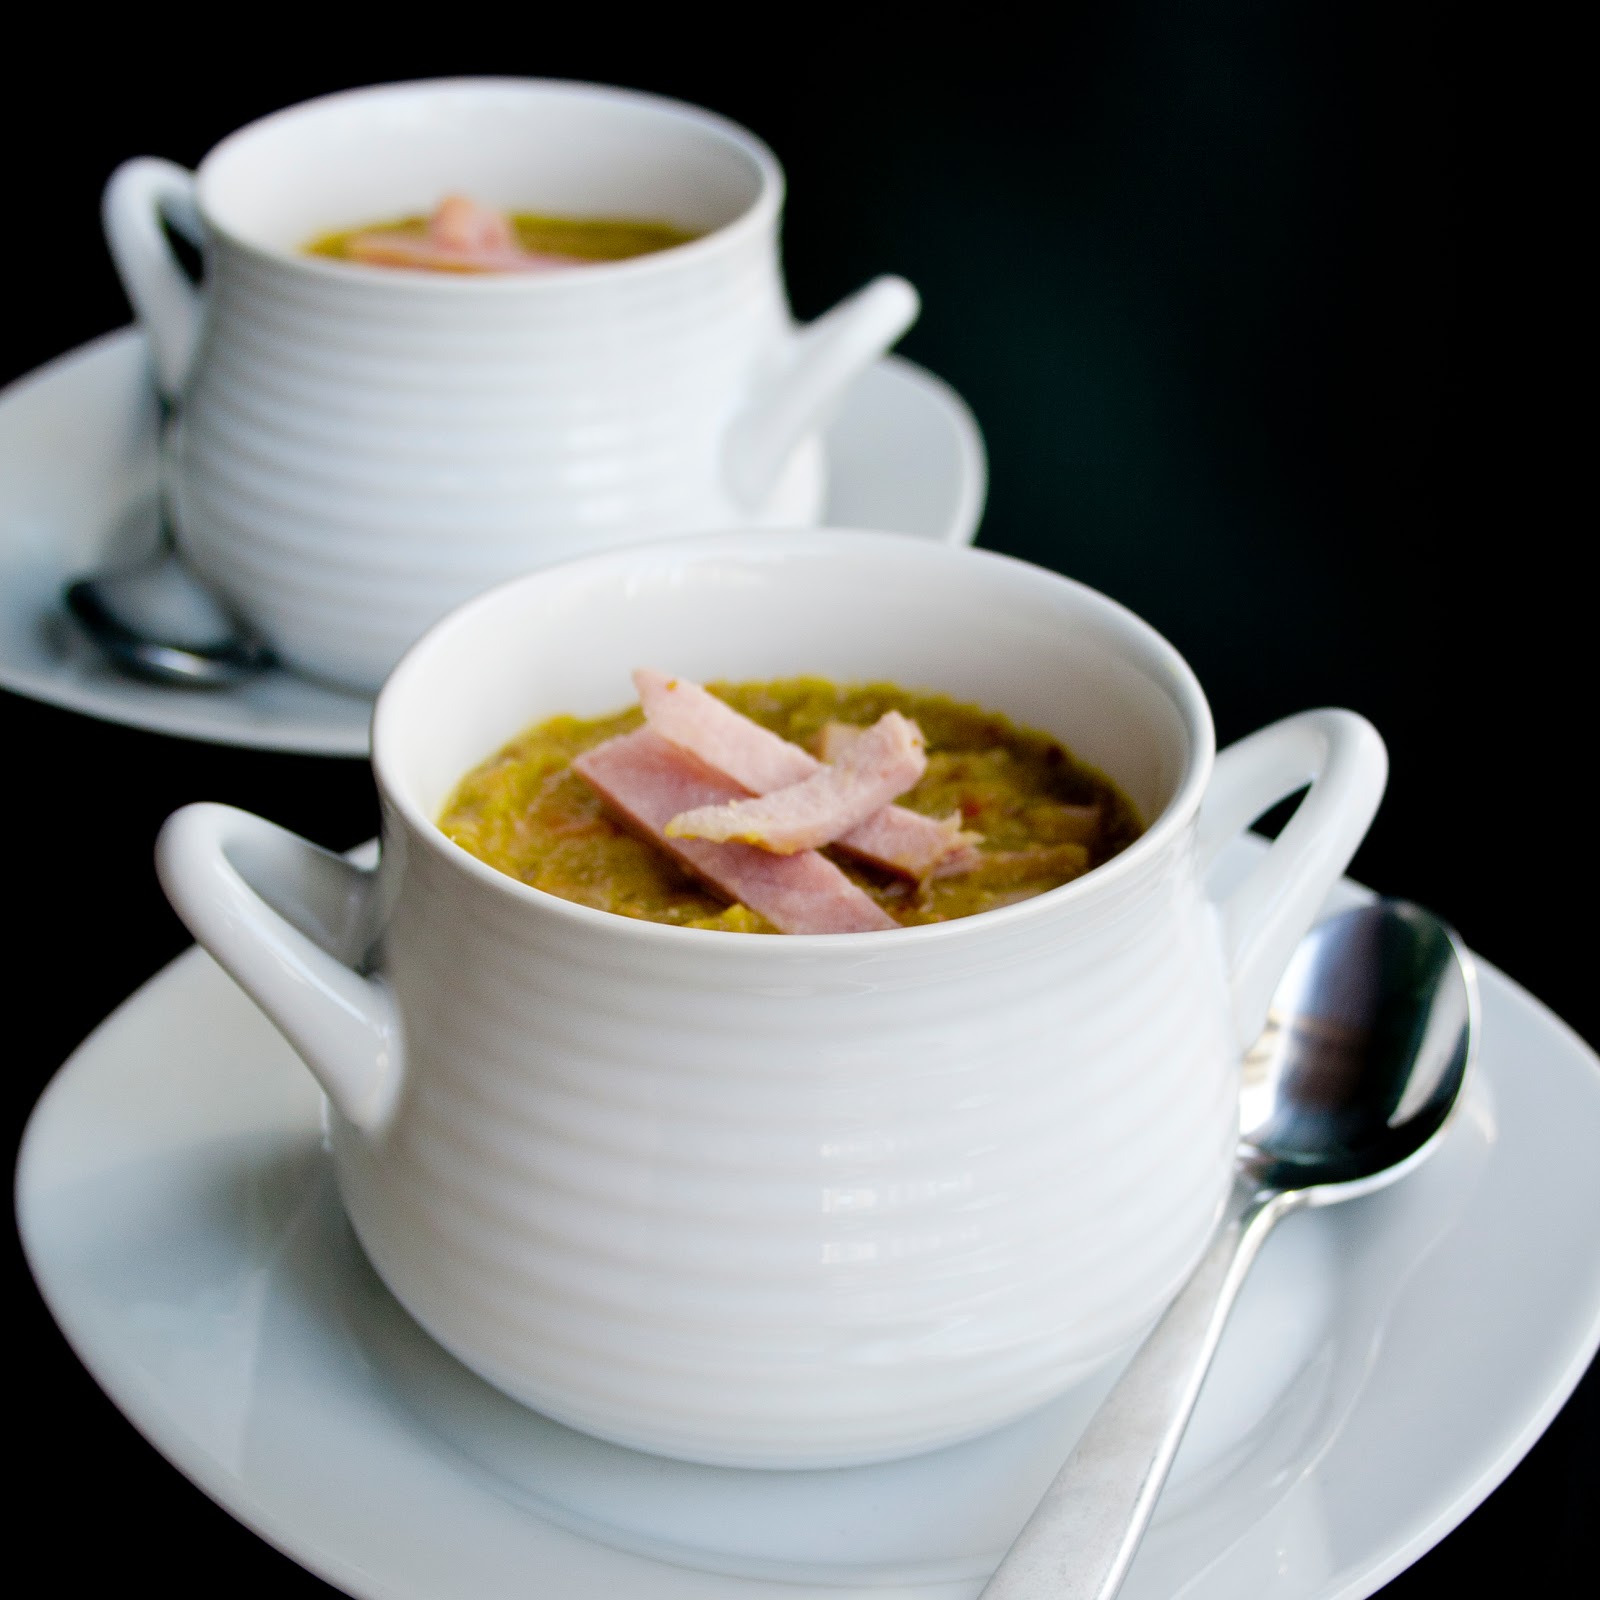
It's starting to get real cold here in Chicago. Nothing says Winter warm me up better than a hot bowl of soup for dinner with some crusty bread. Usually I'm not a big soup for dinner person. I don't have what you would call a 'dainty' appetite. But I've been cold this past week, real cold and sometimes you just need some soup to warm you up! 

Growing up I was never a big fan of split pea soup. I think it was probably due to the brownish-green color which just seemed scary or possibly my distaste of peas. I've gotten over my fear of green food and my hatred for peas and have fully embraced split pea soup! This version is made with ham stock that gives it an extra hearty flavor.  I like my soup on the thick side - makes me feel like I'm eating a meal instead of drinking my dinner. Plus, who doesn't love some ham goodness?! Don't worry, if you're not a fan of ham I have improv suggestions at the bottom of the recipe. Although I'm not sure we can be friends if that's the case...

split pea soup
yields about 8 cups of soup

ingredients:

for the ham stock:
1 ham hock
8 cups water

for the soup:
3 T. olive oil
1 onion
3 carrots
2 c. split peas
1 clove of garlic
3 bay leaves
3 c. diced ham
salt + pepper to taste

To make the stock: You can do this up to a week in advance if you like. Take a big knife and notch your ham hock a few times. Try to hit the bone so you can release all of that great flavor while it cooks. Place in a large pot with 8 cups of water (this isn't science, make sure the hock is covered and that you'll have at least 6 cups of stock by the time it's done cooking. Put heat on medium high and let simmer for about 2 - 3 hours. So easy! Then strain your stock with a fine mesh strainer (or whatever you have). You can either let it cool and place it in the refrigerator or set it aside until while you get the rest of your ingredients ready.

To make the soup: Dice your onion and your carrots into small bite-sized pieces. Place in a large pot with your olive oil heated and cook until softened. Add in your dried split peas and cook for an additional minute. Add in your garlic, bay leaves, and 6 cups of ham stock. Give it a good stir and let it gently simmer for about 1 ½ - 2 hours. Stirring every 10 minutes or so (you don't want the bottom of the soup to burn). It's that easy! The soup will get nice and thick and you know it's done with the peas have softened and broken down a bit. Just before serving, add the ham chunks and cook for 1 - 2 minutes more. Just enough time to heat it through. I like my soup chunky but you can put it in a blender or food processor and puree it before you add the ham. Finish with a dollop of sour cream or greek yogurt and you've got sheer perfection!

improv style:
ham... let's talk about it. not everyone has a ham hock lying around. and while i think it's worthwhile to go to the butcher or your grocer (if they carry them) and get one, sometimes it's not convenient. you can substitute chicken or veggie stock if you like and it will turn out just fine. i just happen to LOVE the depth of flavor and richness that the ham stock gives it.

if you're looking at the ingredient list thinking where the heck am i going to get ham, or what type of ham are you talking about? if you have leftover ham from a holiday dinner, use that ham. if you don't happen to have a hunk of fresh ham, i would buy the thick sliced ham they sell in the grocery deli aisle (they usually come in packs with 3 - ½ inch slices). You don't want to use shaved deli meat you get from the counter unless it's your only option. 

on to the rest... make this soup with your favorite veggies. you can use more or less of all of those ingredients. it just depends on how many chunks you like, and how much veggies you prefer. celery, potatoes or bell peppers could be interesting additions. you could also do bacon or pancetta instead of ham chunks or leave the pork out if you're a vegetarian. don't have bay leaves? no problem... leave them out. your soup will turn out just fine. it adds a subtle depth of flavor that i really enjoy but it's not essential. 

i'm into thick soup. if soup is my meal, i need to feel like it's hearty and got some depth. if you're not into super thick soup, just add more stock to thin it out. this recipe is as thick as it comes!


11.17.2011

better late than never

Last weekend I took a little road trip up to my Aunt and Uncle's cabin in Wisconsin. It was so nice to get out of the city and spend a little time in front of the fire catching up. We took a hike around the lake, played with the twinkies (my cousin's 1 year old twins), and made a trip to the Apple Barn. While it's a little late in the season for picking apples, they still have a ton in the barn. The great thing about apples is that they're available year round. Even though I didn't get to pick any from a tree this year, I still felt like I should share this recipe with you. 

When I was a kid, my cousin Lindsay and I used to go to her Grandmother's house for play dates. Although she wasn't my biological grandmother, Grandma Boyd was always like a second grandma to me. I have random memories of her house, but one of my strongest memories is her homemade apple sauce. She'd always have a batch made for us. It was the best applesauce I've ever had. Slightly chunky with a hint of cinnamon, this apple sauce had a deep brown color and packed a rich apple flavor. I wasn't able to get her recipe but I'm pretty sure I nailed it. 

The secret to my applesauce is roasting the apples instead of cooking them on the stove. It caramelizes the apples while they cook and adds a deep, rich flavor and color. You don't even need any sugar, it's naturally sweet and perfectly balanced on it's own. One bite took me right back to Grandma Boyd's house. I hope you enjoy this easy applesauce recipe!


roasted applesauce
yields 4 c. 

ingredients:
5 fiji apples
5 gala apples
¼ c. apple cider
½ t. cinnamon
¼ t. ground nutmeg
pinch of salt

Preheat oven to 375º F. Cut apples into about ¼ inch chunks with the skin on. Place in a glass baking dish or whatever roasting pan you have on hand. Sprinkle cinnamon, nutmeg, and salt over the apples and place in the oven for about 30 minutes. Once the apples have softened up a bit, add in your apple cider and continue roasting for another 30 minutes. 

When the apples are brown, soft and juicy, they're done! Pulse them in the food processor or with an emersion blender if you have one. I like mine a little chunky but you can puree it to your preferred texture. Eat it hot or place it in the refrigerator and let it chill for a few hours. 

improv style:
you can use whatever apples you like and any combination. some bake better than others though. i recommend the following apples: ida, gala, fiji, macintosh, honey crisp, and holiday. they bake nicely and semi-hold their shape meaning you'll get a great consistency/texture out of your applesauce when you blend it up. you want to avoid apples with a grainy texture like golden delicious. you could even do half apples half pears. also, you can adjust the amount of cinnamon or nutmeg. i'm not the biggest fan of cinnamon so i use a tiny bit to bring out a depth of flavor. you can definitely add more. you could substitute cinnamon for pumpkin pie spice or leave it out completely. if you don't have apple cider you could use apple juice, lemon juice, water, or even another juice like cranberry or grape. you don't have to leave the skin on the apple but after you blend it up you don't even notice it. it's a lazy cheat that ends up benefitting you by giving you all the great fiber from the skin. if it's not sweet enough for you, add some brown sugar or honey to the mixture. although i would leave this to the end because it's naturally sweet as is.

if you don't have a blender or emersion blender, you could try mashing the apples with a potato masher or fork. you could also put it in a food processor or use egg beaters to blend it up. you don't have to roast the apples but i feel like it brings out another level of flavor. you could easily do this on a stove top and add in the liquid before cooking.

this is great on it's own but it would be good on top of pork chops or served with your holiday latkes if you're into that sort of thing.


11.09.2011

everything is better stuffed

A month ago one of my best friends from college got married. And while I could go on and on with friendship, love and sappiness talk, I'll spare you and get right to the good stuff. At her rehearsal dinner, the catering company made these fabulous stuffed acorn squash. I've had acorn squash stuffed before. Heck, I make a wild rice and sausage stuffed one that's pretty tasty. BUT, this squash was stuffed with quinoa and it was amazing. I've tried quinoa once before and it was a HUGE flop. It ended up a mushy ball and I avoided it until recently. If you've had a similar experience, give it another try. I'm glad I did!


Not familiar with quinoa? It's a grain... think of it as an alternate to rice, couscous or bulgar if you've had that. It's not scary and it's pretty easy to find in almost every grocery store. Plus it's packed with protein and magnesium. 


I'm not exactly sure what was in the stuffed squash at my friends rehearsal dinner but the version I've come up with is really tasty. The squash is creamy and sweet and the quinoa stuffing is crunchy, earthy, and hearty. This is a hearty dish on it's own but it would be a killer side with any meal too. It would make a great side for Thanksgiving if you're looking to do something a little different. It's a really fun presentation too. Each person gets their own individual squash bowl. 2 weeks until turkey day... are you ready?


mushroom + leek quinoa stuffed acorn squash
yields 4 servings

ingredients:

4 T. olive oil
1 leek chopped
1 c. mushrooms chopped
2 garlic cloves chopped
3 c. spinach leaves
1 ½ c. cooked quinoa
2 T. toasted slivered almonds
½ t. truffle oil
2 acorn squash (halved, seeds removed)
salt + pepper


Preheat oven to 350º F. Follow the directions on the box of quinoa and cook accordingly. You can use chicken, beef or veggie stock instead of water to add extra flavor if you like. 


In a medium saute pan, add olive oil (enough to thinly coat the bottom of the pan). Once the pan is hot, add in your chopped leeks and mushrooms. Cook until wilted and slightly browned. Add in your garlic and spinach. Meanwhile, in a small pan, toast your slivered almonds over medium heat. Once spinach is wilted, add in your almonds, truffle oil, and salt + pepper to taste. Once quinoa is cooked, toss your mixture with the grains and you're ready to place in your squash. 


Place stuffing into the center of each squash and drizzle with a little extra olive oil over the top. Bake in the oven for about 30 - 40 minutes until squash is softened and the top of the stuffing is golden brown. 


improv style:
this is the kind of recipe where you look in your fridge and you see what you have. leek can be substituted for onions, shallots, green onions. not a fan of mushrooms? leave it out and add in your favorite veggie instead. i like the crunch that the almonds give to the dish but you could leave them out or add in your favorite nut. spinach could be substituted for kale or chard or your favorite leafy green or herb. the addition of cheese would be more than welcome. a creamy goat or feta would be fantastic but you could use any type you like. 


now the truffle oil... here's the thing about truffle oil - it's STRONG. a little goes a long way. you can use white or black truffle oil. if you don't have any on hand, you can leave it out or you could use another flavored oil. i feel like the truffle oil adds depth to the mushrooms already in the dish but it can easily be left out and still taste great. another substitution that goes in a completely different direction would be a squeeze of lemon. it would add a brightness to the stuffing. 


you could do this in a butternut squash or any kind of squash or pumpkin for that matter. the only one i wouldn't recommend is spaghetti because the texture would just be, well, weird. the final substitution i'll offer is by putting your favorite thanksgiving stuffing in the squash. it's a fun presentation and everyone gets their own individual portion of stuffing. think cornbread, sausage, oyster, wild rice... whatever your family's favorite is. this would go perfect with your thanksgiving turkey!