Showing posts with label Healthy. Show all posts

6.17.2016

brunchin' all day err day

Hi my name is Morgan and I want to have brunch every day of the week. Sadly there’s this thing called work that gets in my way. Ugh, reality.


The reason I love brunch so much is because I’m not a big morning eater. I love food, don’t get me wrong. But I need to be up a solid 1-2 hours before I can even think about putting something into my body. 

Which is means brunch is my ideal time. Because any meal before 10a on a weekend is called BREAKFAST. I also believe that brunch without booze is just breakfast. Amiright?!


So can I tell you about my latest brunch obsession? Chilaquiles verde. I legit make these at least once a week and have been doing so for 6 months now. I blame my best friend for getting me hooked. I don’t know how I made it 30+ years without these but she changed my life that day. I’ve been making up for lost time ever since.

This dish is such a perfect thing to improvise. At it’s core, you need eggs, salsa and tortilla chips. The best news?! If you have stale chips, you can use those. It's kind of like the bread pudding of brunch (or breakfast for dinner, I'm not judging).

I like to fancy it up because more toppings = more flavah. I also like mine to have a little texture in the chips, not crunchy but not a saucy mess either. Everyone has their own preference and method but I’m sharing my perfect version with you. How would you change the recipe and make it yours?

chilaquiles 
yields 2 servings

ingredients:
1 TBSP oil (canola or olive oil)
4 c. corn tortilla chips
4 eggs
⅔ c. salsa verde
¾ c. shredded sharp white cheddar cheese

to garnish:
cilantro, chopped
green onion, sliced thin
tomatoes, diced 
radish, sliced thin
sour cream
avocado
hot sauce #swag (tapatio is my fav for this dish)

Before you start cooking, I like to shred my cheese and crack all of my eggs into a small bowl. This dish comes together really quickly so mise en place is key. Don’t forget to prep your garnishes too!

In a large cast iron skillet, heat the oil over medium heat. Once it’s hot, add in the tortilla chips and toss around until they’re golden brown and toasted in some places. Dump in your eggs and gently fold them together until they’ve coated the chips and the eggs are 90% cooked. You want to be careful not to break your chips too much at this part (not the end of the world if you do though so don’t panic). 

Next, add in your salsa and again, fold the chips until it coats your chips. You’ll see them start to soften. This is where you might want to adjust the quantity. If you like a crunchier chip, start with less and if you want them softer, add more salsa - it’s up to you! Once the chips are as soft as you like, add in the shredded cheese and turn off the heat. Let the cheese melt a bit, stir and then serve!

I like to make a little toppings buffet and people can dress theirs how they like. Add your favorite toppings and devour. 

improv style:
i’ve made these a million ways. every tortilla chip is slightly different. some are thicker, some are better tasting. my ideal is whole foods tortilla chips but at $7/bag, they’re quite the treat. i’ve used blue corn chips, yellow and white corn - they all work. if it’s a thicker chip, you’ll need more salsa and thinner, less salsa.

speaking of salsa… use your favorite type. i love salsa verde so i use that but you can do red salsa, chipotle salsa, etc… the options are endless. you can also use enchilada sauce or a combo of things.

cheese is another one that is completely flexible. i usually always have white sharp cheddar on hand but you could use pepper jack, monterey, mozzarella, cheddar, honestly, anything besides the blue or swiss family cheese. you can also leave it out if you’re dairy free or not into cheese. if you’re going to do goat i would recommend sprinkling it on as a garnish instead. same thing with cotija if you’re going for a more authentic approach

ok, on to the fun stuff. garnishes are limitless. just trust your gut and use your favs. last week i had leftover kale and some corn salsa so i threw those into the pan with the salsa and it turned out delish. you can add chipotle in adobo for extra smokey flavor.

if you’re vegan you can leave out the eggs and add more salsa. similarly, you can cook it that way and then top it with fried eggs instead. i like it all mixed. probably because that’s how it was introduced to me and it’s SO GOOD.

now that we've gotten ingredients out of the way, let's talk about improv cooking. i like the chips to still have texture but others like them more saturated or more crunchy. this is where you'll have to experiment and figure out how much liquid to add to your chips to make them perfect for you.

can’t wait to hear how you’d change it up! if you try this recipe, be sure to tag @improvkitchen or #improvkitchen so i can see what you're up to. happy brunching.

12.30.2015

secret health


I’m back from a way long overdue hiatus and since we're coming out of the holidays and the season of indulgence, I thought this was the perfect time to share a bit of healthy new years inspiration with you. 4 ingredient Gluten free sweet potato waffles.

Before I lose you, hear me out... I’m obsessed. Seriously, I couldn’t wait to share this recipe with you.

Some of you are probably rolling your eyes about the gluten free recipe, let me explain! I’ve been trying to eat more clean the past year. I've been working a lot and feeling gross. I knew the one thing I could change was my diet. I’ve felt so much better since making that change. And the best part about it?! I’ve found some seriously amazing recipes that don’t taste like they’re health food.


And don't worry, this blog isn't going to change. I still plan on sharing my favorite recipes and latest experiments from my kitchen - healthy, indulgent and sometimes a combo of both. This new lifestyle still has room for gluten, dairy and all the yummy things, just more sparingly.

When I first made this waffle, it blew my mind. I can’t shut up about it. You would never know that it has no flour in it, let alone the fact that it’s gluten free. Best part? It’s only FOUR ingredients. FOUR. Ok, 5 if you count the pinch of salt. Who counts salt?! This waffle isn't the super crispy kind, it's more pillowy and cake like. I would swear it had flour in it if I didn't make it myself. It’s really great. Seriously, look at that texture!


You can prep the sweet potatoes a day or two in advance too. And there’s tons of things you can add to the mix to improvise it and make it your own, see the suggestions at the bottom of the recipe.

I posted the recipe measurements and process for both a spiralizer and a box grater if you don't have a spiralizer. The pictures are of the shredded waffle but I found the spiralizer a lot more efficient and it makes a prettier waffle.

I haven't tried this batter as "pancakes" but if you don't have a waffle maker, that would probably work too.

sweet potato waffles
slightly adapted from inspiralized
yields 1 waffle (4 triangles)

ingredients:
2 c. shredded sweet potatoes, packed 
1 egg
½ tsp cinnamon
2 tsp vanilla extract
pinch of salt
coconut oil or nonstick cooking spray

garnishes: 
fresh fruit
maple syrup
slivered or chopped nuts
granola
whipped cream or coconut whipped cream (see, small indulgence)

Peel and shred about 1 medium sweet potato. It should fill a 2 c. measuring cup. Make sure you pack it tight like you would brown sugar. You can also use a spiralizer instead. The spiraled noodles should fill a 2.5 c. measuring cup, just don't pack it tight or you'll break the spirals.

In a medium skillet with a lid, heat your pan over medium and add in ½ TBSP coconut oil or cooking spray. Add in your sweet potato and cover with the lid. After 2-3 minutes, toss your sweet potato so that it cooks slightly on all sides. Cook with the lid for another 2-3 minutes until the sweet potato becomes slightly tender but not fully cooked. Shredded will take less time than spiralized. *The cooking step is necessary, trust me, I tried putting raw sweet potato into my waffle iron and had to deal with the consequences.*

You can prep your recipe up to this point 1-2 days in advance of making the waffles if you want. 

Add cooked sweet potato to a medium bowl and let cool for 5 minutes. While you wait, preheat your waffle iron. Add remaining ingredients to your bowl and stir gently until the mixture is fully combined.

Coat your waffle iron in non stick cooking spray and pour your batter in. Cook based on your waffle irons instructions.

improv style:
you can use whatever spices you like in these waffles. not a fan of cinnamon? leave it out. i actually hate cinnamon but it works in this waffle. you can use more if you're really into cinnamon. other great spices would be pumpkin pie spice, star anise, cardamom, cloves, or allspice.


you could add in ¼ c. fresh blueberries, raspberries or strawberries into the batter. i’m not really into cooked berries so i prefer to top my waffle with it but go nuts if that’s your thing!

not a fan of maple syrup? me either. i actually prefer this waffle naked. but you could also top it with butter, jam or even peanut butter or your favorite nut butter.

i'm never one to turn down whipped cream or if you're being healthier, you could do coconut whipped cream.

the next thing i want to try with this batter is adding in almond flour to see if i can get a slightly crunchy texture on the outside. would love to know your improv ideas in the comments below!

4.02.2014

green smoothies round 2


Where did the last 3 months go? I swear it was just the holidays and the next thing I know, BAM, it’s Spring. How has it been so long since I’ve posted?! You probably thought I’ve abandoned you, right? I promise I haven’t. This Winter in Chicago has just been so… COLD. And I’ve been so busy and tired and and I’ve had great intentions of sharing what I’ve been up to in the kitchen with you guys. I just never got around to testing, shooting and writing all of the thoughts in this crazy head of mine. Plus, polar vortex. No human should ever have to experience -40º F let alone 3 different times!!

Just because the sun is out longer during the day doesn’t mean that 36º is Spring, Chicago. Lets close our eyes and pretend that Spring has sprung, for reals. Or maybe you’re already in Spring mode because you don’t live in one of these crazy states with freak cold weather. Did I really just rant about the weather for 2 paragraphs?! I promise I’m not usually that person… 

Lets talk about feel good things. Like cats, new shoes, lipstick and green smoothies. Green smoothies?! Ever since I discovered them over 2 years ago, I’ve been making one for breakfast almost every morning. It’s a natural boost of energy and such a great way to start the day. I’m always looking for new combinations of ingredients to keep from getting bored. My latest favorite is a bit more “advanced”. I say that because when I first started making green smoothies I used unsweetened almond milk and was heavy on the fruit. Eventually you get more and more used to the bright and fresh flavors of the greens and begin to crave it. There’s lots of ways to tweak this recipe to cater to whatever level green smoothie drinker you are - novice to advanced. 


green smoothie
yields 1 serving

ingredients:
1 stalk dinosaur kale
1 c. leafy greens (spinach, red leaf lettuce, romaine, etc…)
2 limes, juice + pulp
1” ginger, peeled & roughly chopped
3” cucumber (skin on)
3 mint leaves
1 green apple
1 c. brewed green tea, chilled

Place all your ingredients in a blender (starting with the kale and ending with the iced tea) and blend on the highest setting for 1 - 2 minutes. Add more tea or water as needed to reach your desired consistency. 

improv style:
i like the balance that the green apple gives but if you don’t have green apples, you could use any apple you have on hand. no kale? you can add a little bit more leafy greens or just leave it out. no brewed tea? just use water!

more of a beginner? leave out the kale and stick to spinach. you can do 1 - 2 apples to amplify the sweetness too. if you’re going to use almond milk i would consider leaving out the cucumber as it might be a weird flavor combo.


finally, you can add in your favorite bonus heath food too! think chia seeds, flax, hemp, etc… 

*note, i'm not usually a mint fan but in this recipe, it's subtle and very balanced. if you're like me, give this mint recipe a try.

**curious about what blender to use and my first discovery of green smoothies? check out the post here. yes, my kitchenaid blender is still going strong 2+ years!


9.18.2013

breaking the silence

Life has been BUSY. Busy but so so so so so so good. I'm breaking the long silence with one of my favorite recipes lately. A good friend of mine in Chicago made this salad for me in May and I've been doing a version of it ever since. She's an amazing person. The kind of person that you meet and instantly feel like you've known forever. She's got such a warm and inviting energy and she's weird. Weird in the best possible way. This salad is such a great expression of how I see her because it mixes some usual suspects with some things I wouldn't think to put into a salad. She's the kind of person that just makes you happy to be around and is always surprising you with her endearing quirks. 

When she first made it for me I was nervous. She combined some of my favorite ingredients with some things I thought I didn't like/wouldn't like together. The salad didn't really make sense in my brain but I went with it. Because I was her guest and because I'm always open to new food combos. I'm so glad I was too because it made me a believer that raw kale can be tasty. This is a kale salad but before I lose some of you, I want to warn you that this is a great intro to kale salad recipe. It's health food light thanks to some awesome ingredients. 

I'm not going to lie, unless kale is blended into my morning smoothie it's usually too aggressive a veggie for my pallet. It's so earthy and fibrous. BUT, this salad does such a great job of distracting you from all of that AND I have three tricks up my sleeve that really makes all the difference for any kale salad. 

Trick 1, chop that kale into thin, small shreds! It makes eating the salad a lot more enjoyable and it's so much easier to chew. 

Trick 2, dress your salad a few hours before you're going to eat it and up to 3 days before! Kale is an incredibly fibrous veggie and unlike lettuce, it won't wilt and get soggy once you put the dressing on it. In fact, the dressing helps break down the kale a bit. 

Trick 3, remove that thick vein that goes down the middle of the leaf. it's super fibrous and not very palatable. 

Now that I've set you up with the basics, lets get into it.


kale salad for beginners
yields 4 servings

6 c. chopped dinosaur or curly leaf kale
1 red bell pepper, chopped
1 c. green beans, chopped
2 carrots, choped
½ c. cooked tortellini 
1 TBSP red pepper flakes (to taste)
¼ c. lime cilantro vinaigrette (to taste)
2 TBSP tahini (sesame seed paste)
⅛ c. parmesan shavings
salt + pepper

In a large bowl, combine all ingredients and give it a few good stirs. Don't be afraid of the red pepper flakes. I thought for sure that one would get stuck in the back of my throat and have me coughing up a storm. Turns out they somehow melt and just add a nice depth of flavor, not crazy spiciness. Let sit in the refrigerator at least 2 hours or overnight. This will keep 3-4 days in the fridge.

improv style:
use seasonal veggies and veggies that you like. i love green beans cooked but the raw green beans in this salad really works. i'm telling you, my friend is magical - every ingredient just works.

if you don't want to make your own dressing, you can use store bought. trader joes makes an awesome lime cilantro vinaigrette. green goddess dressing would be a good option too. whatever your favorite store bought dressing is should work. 

if you don't have tahini, don't go out buying it (unless you want to of course). i like the subtle creaminess it adds to the dish. it's easily left out. 

you can keep this dairy or gluten free by leaving out the pasta and cheese. the tortellini adds a nice texture - little bit creamy, little bit of that awesome pasta chew. the cheese adds a bit of a salty bite and helps tone down the earthy kale. if you're into kale salads, you can definitely leave these two out and go on with your bad self!

get creative!


1.17.2013

i made them extra schloppy for ye!

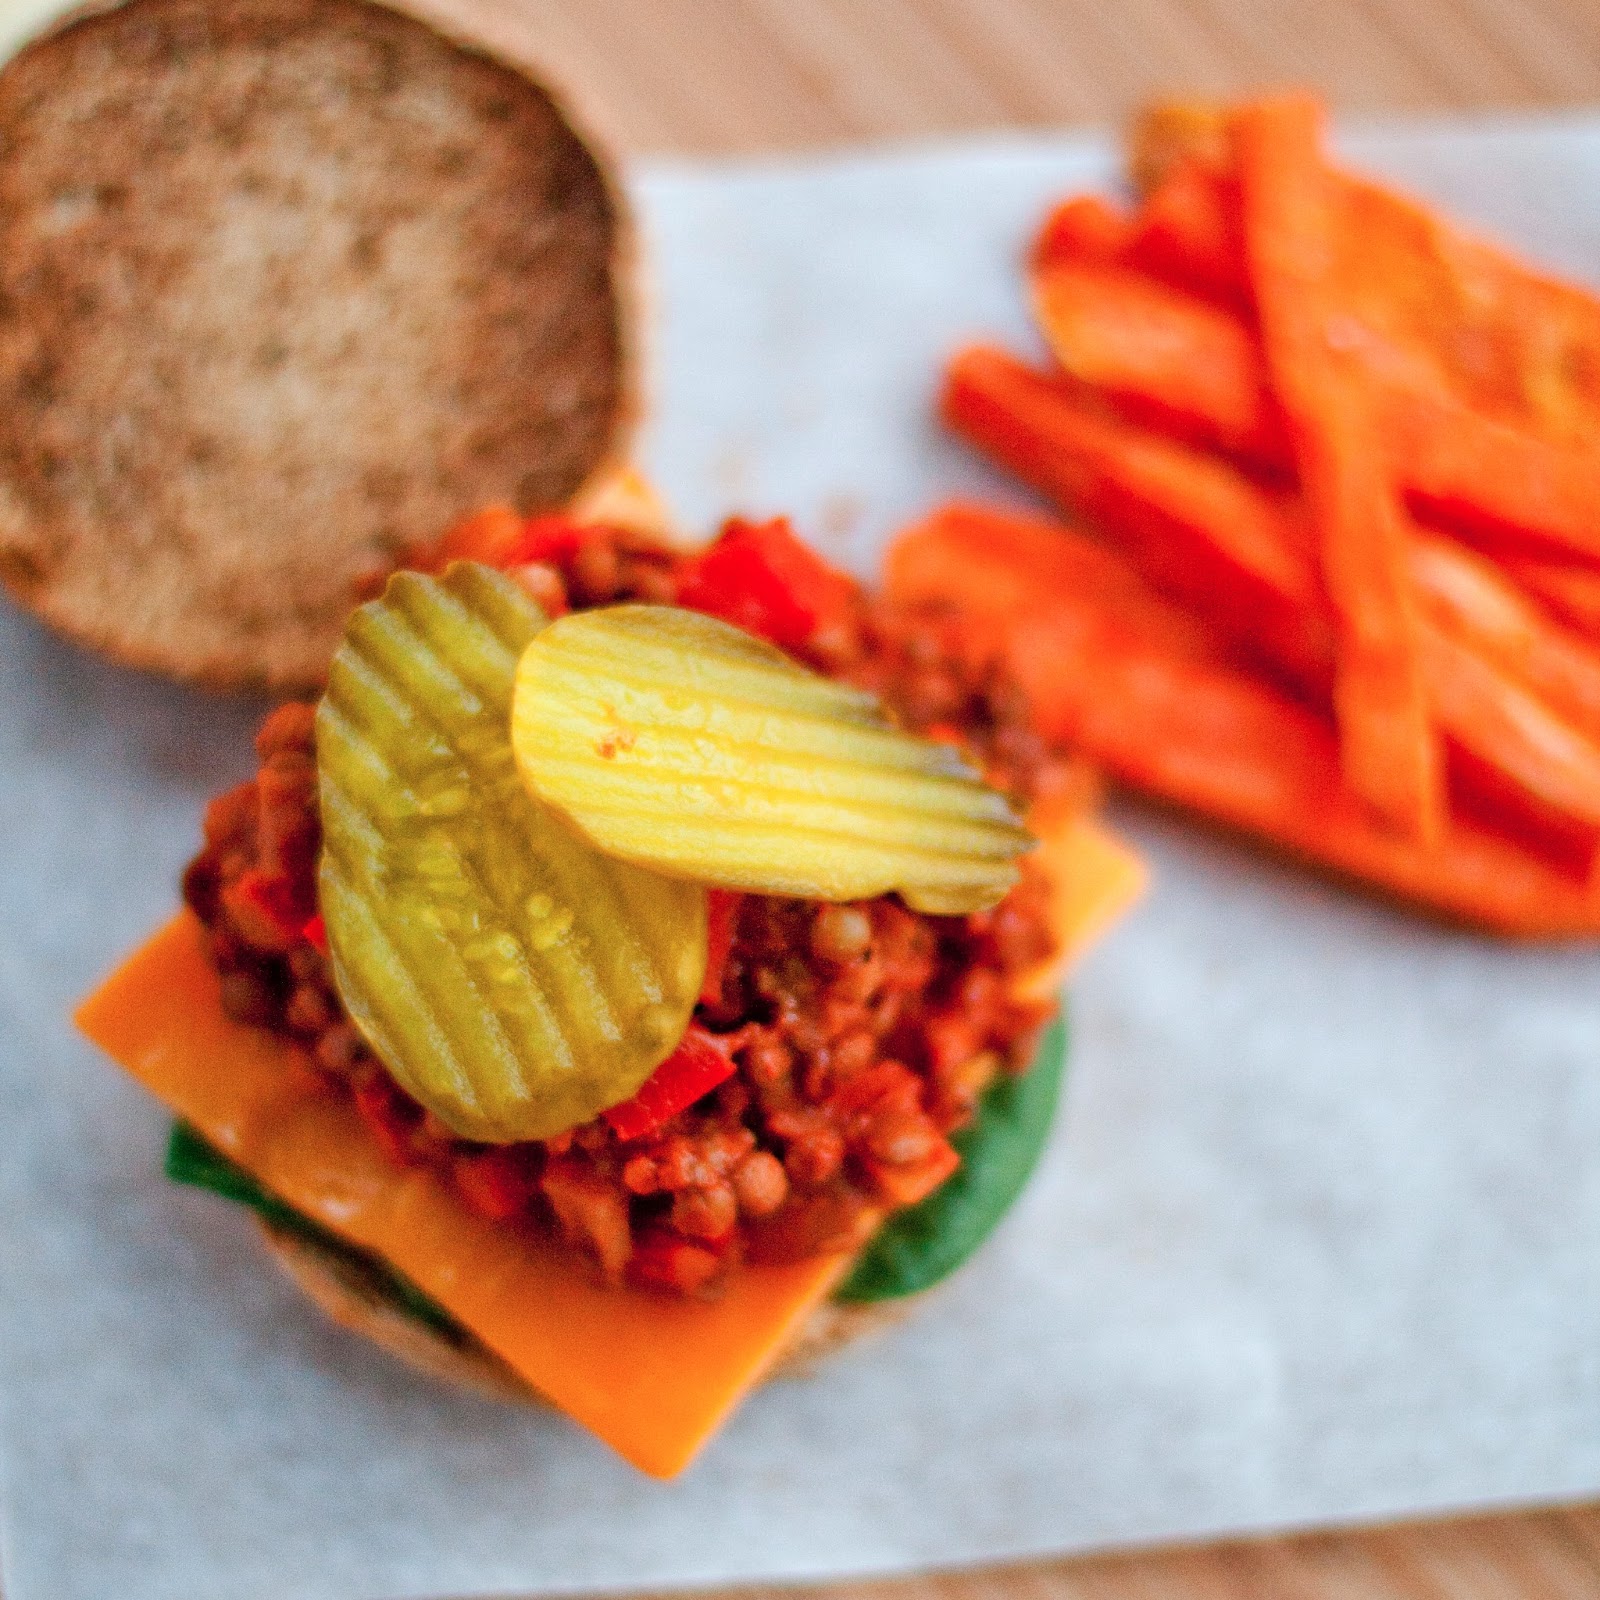
Are you sick of being healthy yet? If so, I've got the perfect recipe to get you fired up again. Since I stumbled upon this recipe in Food Network Magazine a few weeks ago, I can not stop making it. It's one of my new favorite go-to's and I'm not even a sloppy joe fan. I think they had me convinced to try it when I saw the pickles on top. 

This recipe is health food masked by comfort. Lentils, carrots, and red bell peppers are mixed with a little ground beef (or turkey if you want to be EXTRA good). It's got a meaty texture and it's packed with veggies and lots of protein thanks to the lentils and meat combo. I've altered the recipe a bit to make it less processed but this recipe is easily adapted to your needs. 

What's better than comfort food that's good for you?! It's secret health!

 Hope you guys are having an amazing 2013 so far. I've had a lot of fun playing with my new lens courtesy of santa! Can't wait to take more amazing shots to share my recipes with you guys this year! What do you think of the new lens?


lentil sloppy joes
adapted from food network
yields 6 servings

ingredients:
2 TBSP olive oil
1 onion, finely chopped
2 carrots, finely chopped
½ red bell pepper, finely chopped
2 garlic cloves, finely chopped
½ TSP dried oregano
½ c. dried brown lentils
4 c. water
4 TBSP tomato paste
1 TBSP worcestershire sauce
8 oz ground beef
salt + pepper
6 whole wheat buns
6 slices sharp cheddar cheese
handful of spinach leaves
pickle slices

In a large skillet, heat oil over medium high heat. Add the onion and let soften 2-3 minutes before adding the carrots and bell pepper. Cook until softened then add in your garlic and oregano and cook 1 minute more. Pour in the lentils and give em a good stir before adding your water. Bring the mixture to a boil and then reduce the heat to medium low. Add in your tomato paste and worcestershire sauce and let simmer for 40 minutes until the lentils are tender and the water is absorbed. If the lentils are still hard, add in a little more water and keep cooking. 

In another pan, brown your ground beef. Add it into your softened lentil mixture and cook another 5 - 10 minutes to let the flavors meld. Toast your buns or leave em soft… whatever you prefer and add some leaves of spinach, a slice of cheddar, a schlop of the joe mixture and put some pickles on top - voila!

Serve them with your favorite side. I think baked sweet potato fries make the perfect companion!

improv style:
this may seem like a time consuming recipe but most of the cooking is inactive. you can make this a few days in advance so it's a quick meal for the weekday. the mixture gets better with time too, just like spaghetti sauce. 

not a fan of one of the veggies listed? leave it out or substitute it for one of your fav's. if you want to be extra healthy, you could add more lentils and completely replace the meat OR use ground turkey or chicken breast. 

if you don't have tomato paste, you can use ½ c. ketchup or diced tomatoes instead. using beer instead of water would probably be a fun (albeit un-healthy) way to mix it up. 

not a fan of pickles? weird. but i hear you… try pickled jalapenos or fresh ones! you could even chop it up and put it inside the cooking mixture for an extra kick. speaking of heat, put some of your favorite hot sauce in with the mixture. 

you can keep it dairy free without the cheese or use a different cheese like pepper jack, mmmmm! white buns, wheat buns - pick your favorite. lower carb option? make it open faced! SO. MANY. DIFFERENT. WAYS.


10.16.2012

carved peppers for halloween

Remember that Halloween idea I mentioned in yesterday's post?! In the spirit of Halloween, my favorite holiday, I carved some orange bell peppers to look like pumpkins! 


This is such a fun idea and a great way to get kids excited about eating healthy food! You could really stuff them with anything (sloppy joe meat, spaghetti, sausage stuffing, etc...)  but I did an improv version of yesterday's post with corn, black beans and chicken. 

I saw this carved bell pepper idea last year on spa bettie and had to share the idea with you guys. She did it with a carrot ginger quinoa dish. 

Step 1: cut the top off like you would a pumpkin

Step 2: scrape out the seeds and membrane

Step 3: carve your face *carefully* with a kinfe. even better if you have mini serrated pumpkin carving knives

Step 4: stuff with desired filling

You can bake these peppers depending on the filling but they won't hold their shape quite as well. I liked the crunch of the fresh veggie in contrast to the softer quinoa filling. If I were going to make them again, I'd use red or black quinoa to get more of a halloween feel. White was what I had on hand so I just went with it!

Happy Halloween! 


10.15.2012

far from boring health food

I'm all about trying to make healthy choices when it comes to eating. Yes, you have to live and eat well but you also have to treat your body good. It's the only one you get. It's all about balance for me. One of my favorite lunch time restaurants is called protein bar. They have an amazing selection of wraps, salads and my personal favorite, quinoa bowls. Their prices are pretty steep so I've started making my own versions to bring into work. 

This is health in a bowl that tastes nothing like "health". Seriously, I'm very particular about what types of healthy food I'll eat. I have to trick my butter loving, fatty taste buds into the good for me foods. This quinoa bowl is super filling, flavorful and taste bud approved. 

Tomorrow I'll even show you how to turn this into a fun halloween themed lunch or side dish! Kids will go crazy for it. Or, if you're a halloween loving adult like me. Seriously, it's my favorite holiday! That or Thanksgiving. Pretty much anything involving food, orange, fall and dressing up!


mexican black bean quinoa bowl
inspired by protein bar

ingredients:
2 c. cooked red quinoa
1 - 15oz can of black beans drained & rinsed
4 oz can diced green chiles
½ c. salsa verde
1 TSP ground cumin
½ c. chopped tomatoes
2 TBSP shredded sharp cheddar cheese
1 avocado diced
salt + pepper to taste
lime wedges to garnish

In a medium sauce pan, cook beans, green chiles, salsa and cumin over medium heat until warmed, about 5 minutes. Add in cooked quinoa and heat through. At the last minute, add in tomatoes and diced avocado. Stir, plate and top with shredded cheese and a lime wedge. 

improv style:
there are a MILLION ways you can improvise this dish! lets talk types of quinoa… there's white which is most common, red and black. I like the contrast that the red quinoa gives to the dish color wise. taste and texture are almost the same. white quinoa is a little more mushy but barley. any type you choose will be great! 

lets talk veggies. corn, jalapenos, diced peppers, peas, carrots, green onions, raw onion (preferably red or white), cilantro, and many many other ingredients would make great additions or substitutions to the dish. 

i love salsa verde but you could use any salsa here. additionally, chipotle would be fantastic if you're into smokey subtle heat. tabasco or your favorite mexican hot sauce would be delish too! also, no salsa? not to worry. you can use your favorite taco, fajita, or mexican seasoning mix and add a teeny bit of water to get it coated (try 1 TBSP of liquid at a time). 

i've made this with meat in the past too. chicken, steak, even marinated shrimp would work well. just make sure you season your meat!  it makes a great side but when you add in meat, it's a super hearty dinner or lunch in a bowl!

you can leave the cheese or avocado out but i think they make the dish. not into cheddar? chihuahua cheese or queso fresco would be delish. also, if you're feeling like a dollop of sour cream or greek yogurt, that would be fantastic too! this dish is pretty hard to mess up!


** note these images are missing avocado. mine went bad before i could shoot the recipe but i still prefer the dish with which is why i included it as an ingredient in the recipe!

10.12.2012

bahn meatloaf sliders

So remember that post from a few days back where I told you about not being a fan of meatloaf… well, turns out, leftovers of that amazing bahn meatloaf make for REALLY good slider sandwiches. Remember that sauce you saved for later? Yep, slather some of that on a sweet hawaiian roll, a slice or two of your leftover loaf and top with your extra veggies. Hot or cold, these things are killer! 


bahn meatloaf sliders
adapted from bon appetit

ingredients:
leftover bahn meatloaf slices
hawaiian sweet rolls
leftover hoisin glaze
leftover matchstick veggies (carrots, cucumber, radish, cilantro)

you know how to make a slider. assemble and be happy!

improv style:

you can add all sorts of fun things to the sandwiches. how about some onion strings if you ate up all your fresh veggies? your favorite asian sauce would be great if you didn't have leftover glaze (think siracha, hoisin, maybe even a bit of dark soy mixed with ketchup).

no sweet hawaiin rolls? brioche, challah, plain white bread, whole wheat buns, pretty much your favorite chewy bread will do. trying to be healthy? make the meatloaf with ground chicken or turkey breast and do an open face sandwich on whole grain bread. your options are endless!


10.10.2012

comfort with a twist

My man likes meatloaf. I hate meatloaf. I don't know why, I'm just not that into it. Even a "good" meatloaf is still just meh to me. I've made it my mission to find a recipe that gives Matt what he loves without making me curl my nose. Selfish, right?! I have to say, this recipe has me reconsidering this whole meatloaf thing!  With a little help from Bon Appetit, I've made a meatloaf we both enjoy!

No, it's not your traditional meatloaf, but it is technically a loaf made of meat so I'm going to call it a win. Matt LOVES bahn mi sandwiches and when I saw the hoisin-glazed mealoaf sandwhiches in their March issue, I knew I had to try it. Just enough Asian infusion to take a regular hunk of meat and make it dreamy. It's bursting with flavor and the fresh, crunchy veggies on top combined with the sweet and tangy glaze make this recipe memorable. While meatloaf (even bahn meatloaf) isn't ever going to be a meal that I could eat every day of the week, I'll consider this dish a win! 

bahn meatloaf
adapted from bon appetit

ingredients:
for the loaf:
1 lb ground pork
1 lb ground beef
2 c. bread cubes (I used white bread finely diced)
½ c. milk
1 tsp. ground star anise (was about 3 whole, ground up)
1 tsp. garlic powder
1 tsp. onion powder
1 TBSP olive oil
2 carrots finely shredded
1 celery stalks finely diced
1 bunch of green onions diced, including dark green parts
7 garlic cloves finely chopped
¼" of ginger minced
2 eggs
2 TBSP. hoisin sauce
salt + pepper to taste

for the glaze:
¼ c. hoisin sauce
2 TBSP ketchup
1 TBSP brown sugar
1 TBSP siracha
1 TBSP rice wine vinegar
1 TBSP soy sauce

for the salad:
1 c. matchstick sliced carrots
1 c. matchstick sliced radishes
1 c. matchstick sliced cucumber
½ c. chopped cilantro

Preheat oven to 375º F. Line a medium baking sheet with parchment paper or tin foil and set aside.

In a skillet, drizzle with olive oil and cook carrots and celery until they start to soften. Add in green onions and garlic and cook 2-3 minutes more until softened and fragrant. Let cool in pan. In a small bowl, combine bread cubes and milk and let the bread absorb the liquid. In a large bowl, combine spices and eggs and stir until combined. Add cooled vegetable mixture and bread slices in with the egg mixture and stir. Add in your beef and pork and work together with your hands until well combined. Dump mixture onto baking sheet and form into a loaf shape. In this case, I made 6 mini loaves - do what you prefer.

In a small bowl, combine glaze ingredients and top a few spoonfuls over your loaf. Put remaining sauce in the refrigerator (you'll want it for leftovers or if your man insists on over saucing his slices). Bake for 40- 45 minutes if doing mini loaves or 1 hr 20 minutes for 1 loaf. It should read 165º F internally when inserted in the center of the meatloaf. All ovens and loaf sizes will cook slightly differently. Temperature never lies! Let the meatloaf rest for 10 minutes before slicing and serving. Top with fresh veggie salad. I like to serve it with a side of cilantro rice as well. 

note: this recipe can be made 1 - 2 days in advance and kept in a sealed container in the refrigerator before baking. it also freezes really well. 

improv style:

beef, pork, turkey or chicken. pick your  meat or your combo of meat. just make sure you have 2lbs. 

sweet challah, brioche or hawaiian bread would be a great substitution for white bread cubes. you can also use whole wheat if you like but i find it's a bit drier. use whatever kind of milk or cream you have on hand. i used non-fat. 

star anise?! it's a common asian spice that has anise like qualities. i hate licorice but this spice adds something special to the mix. if you don't have it and don't want to buy it you can substitute for chinese five spice. a hint of cinnamon might be nice here if you're into that sort of thing. lots and lots of fresh garlic makes this delish. i recommend you stick to it. if you don't have fresh ginger, you can substitue for 2 tsp. of ground ginger. i like to think fresh makes a difference though. 

i use carrots and celery because i like the added veggies. if you don't have one or the other on hand, leave it out. you can also add in your favorite veggies like bell peppers and maybe even broccoli chunks. 

for the glaze you can choose your own adventure. keep it sweet or make it spicy. this recipe is right in the middle. matt's not a big fan of spicy so i keep it on the milder side for him. you can adjust the measurements here very easily. this one isn't science, just yummy sauciness. 


7.30.2012

winner, winner chicken dinner!

A few months ago I was lucky enough to take a bucket list trip to visit one of my best friends in Peru. I've been wanting to see Machu Picchu for a long time and the fact that Meg moved to Cusco made it the perfect, stars aligned moment to bite the bullet and buy the ticket! 

The colors and flavors of Peru took my breath away. I wasn't really familiar with the cuisine until I did a little research. Depending on where you're at in the country, they're known for different things. Cuy - Guinea pig, alpaca, ceviche, potatoes (over 3,000 varieties), and quinoa to name a few. We were lucky enough to have the chef at our hostel create a feast of peruvian dishes for us to try. I guess that's the perk of being best friends with the owner's girlfriend :)

We feasted on lomo saltado, aji de gaina, potato dishes of all sorts, Mazamorra morada - a purple corn pudding that tastes like Christmas, ceviche, peruvian fried rice, and 3 other amazing dishes that I didn't catch the name of. We feasted like kings. My favorite was the lomo saltado - a simple steak dish with peppers and onions served with french fries AND rice. Everything in Peru seemed to be served with two forms of starches. 

One thing I really enjoyed were all the different ways they used and prepared quinoa. For our first meal in Cusco, Meg took us to one of her friends restaurants. Almost immediately upon sitting down they brought us some little nuggets of chicken crusted in quinoa. Um, GENIUS! I immediately proclaimed to Meg that this would be making an appearance on the blog, and here it is!

I love the idea of using this seed (although I think of it as a grain) to create a healthier, protein + fiber packed chicken finger. I baked mine but if you're feeling naughty, frying would make them spectacular. That's how they were served to us in Peru and I have to say, I preferred the crunch frying gives it. And lets be real, how naughty could it be when you're using such healthy things?! 


quinoa chicken fingers
yields 4 servings

ingredients:
4 chicken breasts or 8 - 10 chicken tenders
2 eggs beaten
2 c. cooked quinoa (I used red but you can use any type)
1 c. panko bread crumbs
2 tsp onion powder
1 tsp garlic powder
salt + pepper to taste
drizzle of olive oil

In a shallow bowl, beat eggs and set aside. In another shallow bowl, combine: quinoa, bread crumbs, onion powder, garlic powder, salt + pepper.

Pat your chicken dry with some paper towels and then dunk them in the egg mixture. Pick one piece up at a time, allow the excess egg to drip off and then dump it in the quinoa breading mixture. Pat hard so that you get as much of the coating to stick to the chicken breast. Place on a baking sheet (TIP: I like to put my wire cookie cooling racks on top of the baking sheet so that they bake up extra crispy). Repeat until all chicken pieces are coated. Depending on how much mixture sticks to the chicken you may need to add more breading. This isn't science, just dump some more of the breading ingredients and continue dipping. Drizzle lightly with olive oil and place in oven. 

Bake at 350º for about 20 - 25 minutes depending on thickness (15 - 18 if using chicken tenders). Serve with your favorite dipping sauces.

improv style:
you can make this gluten free by using all quinoa or using GF bread crumbs. i served this with a roasted red bell pepper sauce but you could add all sorts of fun seasonings/flavors to the chicken tenders before baking. consider using this spice mix or your favorite curry spices lightly dusted on the tenders before dipping into the breading. also, marinading the chicken in some buttermilk or dairy with spices would be a great idea. give the meat some flavor while tenderizing it!

you could even serve these as little chicken nuggets by chopping up the chicken tenders into bite sized pieces. this is how we had them as an appetizer in Cusco. next time i make these i'm totally doing bite sized pieces. 

i used red quinoa but you could use brown quinoa or even experiment with other grains/nuts. additionally, i used panko bread crumbs but experiment with your favorite or whatever you have on hand. i liked a 2:1 ratio but maybe you'd like more or less bread crumbs in the mixture? if you like your tenders extra crispy, i recommend frying them in a little bit of oil instead of baking. watching your cholesterol? you can whip up egg whites instead of using whole eggs.

these can also be frozen before baking and kept in an air tight bag/container for a few months. so make a double batch and freeze half so you can have tons of chicken on hand for later!